Wednesday, December 31, 2014

Under Pressure: Inflicting More Pain With Less Force

Science concepts: pressure

Seeing as how this is the week between Christmas and New Year's Day, which is my vacation, I'm going to keep this one short.  It may seem a bit obvious, but obviousness (if that's even a word) is dependent on what kind of science background you have.  So today I'm going to explain why edged and pointed weapons work.

The Science

Pressure is one of the key components to causing damage to human tissue.  Force is a component as well, but the area over which that force is applied can make the difference between a light massage and a stab wound.  This can be seen from the formula for pressure.

P = F / A

where P is pressure, F is force, and A is area.

This makes sense from a practical position.  If I lightly push my palm into someone's back, they probably won't feel pain because the force is distributed over the entire area of my palm.  If I use the same force to push a tack into someone's back, then it's likely to break the skin and draw blood because the tack has a much smaller area.  This is the reason that pointed weapons work.  Weapons in general are just "force" multipliers in that they augment a similar action that is from an unarmed person.  In this case, pointed and edged weapons "multiply" the force of a strike by dividing it by a smaller number.  A slap may or may not cause much damage to a person, but a slash using a knife with the same speed and momentum probably would.

Other Applications

So, this idea of pressure is pervasive.  It applies to punching and kicking and any other strikes.  When punching, if you make contact with just two knuckles, it's going to have greater pressure on the opponent's body (and your hand, remember Newton's 3rd law of motion) than if you made contact with four knuckles.

Conclusion

Like I said, there's not really much that's surprising here, but if you stop to think about strikes and certain grappling (pain compliance) moves you can see a bunch of ways to apply the principle of pressure to your training.  Now I'm off to fatten myself up a bit more so I can make more progress in my New Year's resolutions :-).

Wednesday, December 24, 2014

Don't Hurt Yourself

Science concepts: shear force, moment of inertia, F = ma, torque, anatomy

“Repeat after me,” said the second highest ranking black belt instructor in my taekwondo school. “I am a legend...” We all repeated, but he continued.  “…in my own mind.”  He paused to let us finish repeating his statement.  His point was that we viewed ourselves as spectacular fighters, as I believe many martial artists do.  A lot goes well for us in our mental theater when beating down our imagined opponents.  Or maybe it’s just me, but I doubt it.  In our day dreams, our strikes all have devastating effects on the bad guys, but the fact of the matter is that running parts of your body into certain parts of other people’s bodies can really hurt you.  Here, I attempt to address some of the more common ways that martial artists hurt themselves on other people.  My assumption is that if you enjoy martial arts the way I do, then you’re hoping to be able to continue practicing when you’re 70 years old.  As a side note, I went to a Dan Inosanto seminar a few years back.  Despite him being 70+ years old, I’m pretty sure he could still whoop me.  So, let’s look at a bunch of wrong ways to do martial arts and how we can train for longevity.

Let’s Take It From The Top!

I have to start somewhere and a top down approach is as good as any.

The Headbutt
One of the techniques of choice for fighting soccer players everywhere, the headbutt can be a devastating strike but not just for the recipient.  Sure, the skull is shaped well for structural integrity.  The likelihood of you breaking your skull from impact against another person is slim.  The skull isn’t what I’m worried about.  I’m worried about the brain.  You know…that (roughly) three pound organ inside your skull that RUNS YOUR ENTIRE BODY.  The reason your skull is so great at distributing force is because protecting your brain is critical to your well-being and your survival.  That doesn’t mean that you should use it as an impact weapon.

Let’s look at the science.  Anatomically, the skull is not perfectly smooth on the inside.  There are little jagged edges.  They’re small…but jagged.  Now let’s consider the physics of the headbutt.  You thrust or swing your head towards the target, accelerating your skull and brain up to max speed over a “large” distance (3 to 18 inches).  When you make contact, your skull decelerates from its max speed back down to zero in a couple centimeters.  This spells bad news for your brain.  Imagine that your skull is a car and your brain is a baby in a car seat that’s not strapped in.  Smashing your car against another car is not going to go well for the baby.  I’m going to stop the analogy there because the imagery is too gruesome, yet it is accurate.  Your brain will splash (this is an official neurology term…brain splash) against your skull, which has those jagged edges.  So your brain suffers blunt trauma and potential tearing.

“But I don’t feel any pain when I headbutt!” Yeah, there’s a reason for that.  While the brain may be made up of nerves, not all nerves are designed for feeling touch sensations.  There are no pain receptors in your brain.  This is good and bad.  It’s good because that way you won’t get a tickly sensation every time you turn your head.  It’s bad because you can bludgeon it and not realize that YOU’RE GIVING YOURSELF BRAIN DAMAGE.  Heck, one of the ways to knock someone out is to give them that brain splash.  When you headbutt, you do that to yourself.

Here’s a tip: don’t ask the brute of a martial artist that has been smashing his head against things for years about headbutting, ask a brain doctor.

My advice is to avoid putting your brain into a highly accelerated or decelerated frame of reference.

Elbows
The elbow is a very hard part of the body, which is what makes it such a great striking tool.  Some arts, like Muay Thai, are known for their myriad elbow strikes.  It’s a great blunt instrument, but it comes with caveats.  Some people might say that “the sharper the striking surface you can use, the better.”  Typically, I’d agree, but not in the case of elbows.  To illustrate why, I have a personal story to share.

Years ago I was spending a lot of extra time at the dojo.  We had some 180 pound, tall heavy bags that were great for striking practice.  I was doing a lot of elbows, striking with the point of the elbow for maximum pressure on the target (Pressure = Force / Area).  In class, we were also working on ground fighting, which meant that my elbows often rubbed against the ground.  All of this contact on the tip of my elbows began to agitate my bursa.  Prior to this incident, I didn’t even know bursa existed.  


The bursa is a gelatinous cover over the tip of the elbow


When my elbow began to look like it swallowed a golf ball, I decided to look it up.  The swelling after class was at least an inch (no exaggeration) above where my elbow should be.  Much like this:


  I waited several days for it to go away on its own, but it didn’t.  It was terribly painful and was disrupting my sleep.  I ended up going to the emergency room.  They drained it with a syringe and gave me some antibiotics (which actually resulted in another crazy story…but for another time). 

Needless to say, I changed the way I did elbow strikes.  Rather than striking with the tip, I strike with the final inch or two of my ulna bone or with the very bottom of the tricep tendon area when doing downward/backward elbow strikes.

After doing some searching online for “bursitis” I learned that plumbers often get bursitis in their knees because of all the rubbing from crawling under sinks.  If you want to train for longevity, don’t irritate your bursa.  By not striking with the very tip of your elbow, you also get the added benefit of reducing the risk of chipping a bone, which thankfully has never happened to me but it does happen.

Punching
Fists seem to be the weapon of choice for unarmed combatants.  Despite the commonality of punching, it’s actually somewhat difficult to do correctly.  In Hock’s Unarmed Combatives program, punching doesn’t show up until level 5 (level 10 = black belt).  It’s preceded by finger strikes to the eyes, forearm strikes, elbow strikes, and hammer fists.  Punches have a relatively small margin of error regarding structure (link to structure article) because of all of the joints involved.

But let’s put all of that aside for the moment and assume that you can perform a punch perfectly.  Things can still go badly for you if you hit the wrong target.  For a large number of psychological and sociological reasons, people like to aim for the head.  There’s some wisdom to taking out the head in a fight.  However, remember earlier when I talked about the skull’s ability to absorb force well?  Yeah, that’s going to work on your fist if you hit the hard, immovable part.  
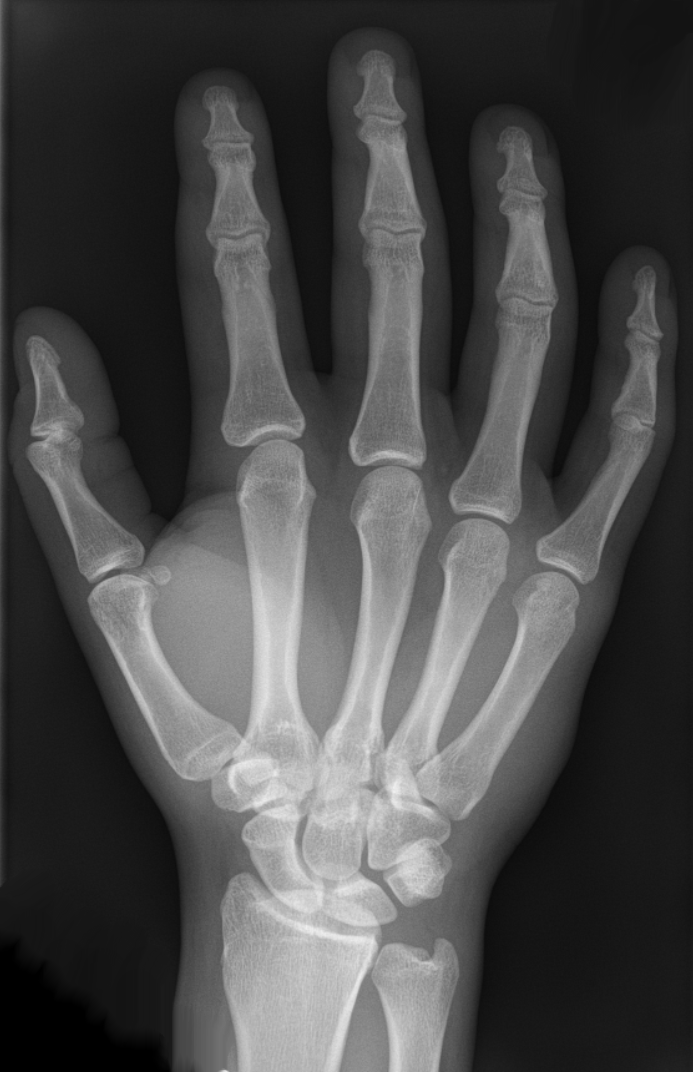
Just look at the anatomy here: fist vs cranium. 


 Domes are basically meant for distributing force.  So, when the comparatively tiny bones of your fist slam into the bone that protects one of the most critical organs of the body, things go badly for the fist.  Just do an image search online for “boxer’s fracture” to see what kind of goodness awaits the fist swinging head hunter.

The fist is a great weapon.  Just don’t run your fist into anything structurally stronger than it and you’ll be ok.

Knees
Knee strikes are actually, for the most part, safe to do.  I’m really only thinking of one particular knee strike, which is somewhat rare.  Although, all of that stuff on saving your bursa applies here too, though your knee is likely to be much sturdier than the elbow.  The strike of concern is the one where the knee is swung from the outside/open position to the center, which uses the medial (inside) part of the knee to strike.  To see why, look at this picture of a knee. 


When striking this way, you’re smashing the medial collateral ligament (MCL) against the target.  That’s bad all on its own.  Speaking of knee ligaments, the torque put on the knee happens in a direction that the knee isn’t meant to go.  Forward/backward movement for the knee?  No problem.  Side to side?  Not so good.  Also look at the cartilage.  When the knee impacts something sideways the tibia and femur will put a shear force on the meniscus.  The meniscus is designed to be squished not sheared.

Without good, healthy knees your martial arts options are very limited.  Take care of them.

Shin to Shin
I, like many people, was looking forward to the rematch of Anderson Silva against Chris Weidman.  The first time was a bit of a fluke because Silva got too cocky.  With skill like his, he can afford to be fairly cocky.  He just went a bit too far.  I figured that the loss would make him come back as fierce as ever.  No more toying with his opponents.  He had something to gain by winning this time, and it showed.  He was intense, pressuring, and fast.  Unfortunately, he was a bit too fast.  I knew what happened before he even set his foot down after the kick.  I’d seen that motion before.  It was the motion of a foot and knee out of sync.  Sure enough, Anderson Silva snapped his shin.  It was empathetically painful and heartbreaking all at the same time.  I wanted to see what he could do, and now I probably wouldn’t get the chance.

Now, like I said, I’d seen this kind of break before, but the break got a lot of media play because it was Anderson Silva during a title fight.  So, people talked about it, and it got me thinking.  “What happened to cause the break?”  I searched for videos of leg breaks and compared them to Silva’s.  I found a common element.  You might think it has to do with the way the defensive shin is raised, but that defense doesn’t result in a break more often than not.  No, the common element in the breaks was in the kick.  Every single instance of someone breaking their shin was because they didn’t rotate their support foot.  By not rotating the support foot (I can just hear my TKD instructors shouting at me now…”PIVOT!”) the hips can’t rotate over, which means the kicking shin moves roughly at an upward 45 degree angle putting the flat of the kicking shin against the edge of the defensive shin.  That is the key factor in whether or not the shin breaks.

Imagine taking two equal length 2x4 planks of wood and hitting the thin edge of one against the wide edge of the other.  Which do you think will break, if any?  The wide edge will lose every time.  This is due to bending stress.  The maximum bending stress that a particular object can endure before undergoing irreversible deformation is of particular interest to us.  A wire hanger is fairly springy, but if you bend it too far then it gets stuck that way.  Bones are similar, but they’re not as springy.  The maximum bending stress that an object can undergo depends on what it’s made out of and its dimensions relative to the load being applied to it, but enough of defining terms…

There is A LOT of math that goes into these formulas and I can already feel your boredom creeping in.  So, I’ll get to mathematical punchline.  The formula for bending stress experienced by a material is:

                                                                        s = M y/Ix

                                        M = The bending moment at the load point
                                         y  = The distance to the neutral axis
                                         Ix = The second momentof area about the neutral axis


M and Ix have further formulas to break down into.  The formula for M is based on Hooke’s Law and expands to different things depending on the situation.  I’m going to assume that the shin can be approximated by a cantilever beam with the “fixed” point being the knee. 

                                                                          Mmax = dF

                                          F = The load force being applied
                                          d = The distance from the load point to the fixed point (the knee)

I will assume that the shin bone can be loosely approximated to have a rectangular cross section (a wide side and a thin side).  For our situation, the load is applied parallel to the height.


Therefore, Ix comes out to

                                                                           Ix = wh3/12

                                                            w = The width of the rectangle
                                                            h = The height of the rectangle

Now, this formula for Ix is where my intuition comes from.  Notice how only one of the directions gets cubed?  That means that one direction is more important than the other for determining bending stress.

The final piece is the ‘y’.  The neutral axis is going to be near the middle.  So, we can say that y = h/2.  Putting it all together we get

                                                                 s = dF(h/2) / (wh3/12) = 6dF/(wh2)

(My apologies for the ugly notation...re-writing it by hand might make things easier to read if you actually care to see what's going on.)

Whew!  Ok, what does all of this mathematical and engineering craziness tell us?  Let’s handle the numerator first.  We see that the higher the load force, the more bending stress there is.  That makes sense.  We also see that we get more bending stress the farther from the knee we hit.  This makes sense if you think of the load as a torque that uses the shin as the effort arm.  Now for the denominator we see the dimensions of the rectangle/shin.  As elements of the denominator get bigger, the bending stress gets smaller.  That means that thicker objects experience less bending stress.  This makes intuitive sense.  The interesting thing is that the height, which is the amount of material the load force is trying to push down through, has a bigger impact on the bending force by a power of 2.

So, now imagine two similarly structured shin bones hitting each other (like the 2x4 example) where the wide side of one hits the narrow side of the other.  The formula tells us that the one that impacts on the wide side will experience a greater bending stress.  If that bending stress gets too high, then someone isn’t walking home.

What’s the lesson after all of that pontificating?  Well for one, don’t kick people in the shin with your shin, but if you do use the narrow edge of your shin by rotating your support foot.

Top of the Foot
The advice on the fist vs skull issue applies here, for sure.  Definitely don’t kick people in big, hard bones with your dainty little meta-tarsals if you don’t want a swollen and/or broken foot.  That being said, there’s something else to be careful about when kicking.  This is a lesson I had to learn the hard way.  The learning came slowly because the injuries were never so bad that they lasted more than a few days.  Eventually though, I became wise enough to stop hurting myself with my kicks.

In my five years of TKD, we focused a lot on the round kick.  Being a 6’ 4” lanky guy, I was able to use rotational inertia and angular momentum to my advantage for firing off hard and fast round kicks.  I was trained to use the top of my foot as the weapon “for maximum reach” I was told.  That works great in theory, when kicking into the air, and when pulling your kicks in point sparring.  Where it doesn’t work is on a heavy bag or an opponent that has decided that blocking your kick by meeting it with direct force.  That’s a fact I discovered on several occasions, resulting in slight sprains.

Let’s think about this.  I’m told to point my toes to avoid breaking them on contact.  That’s good advice but doesn’t go far enough.  By pointing my toes, I extend all of the muscles on the front of my lower leg.  When the top of my foot hits a target, Newton’s 3rd law of motion comes into effect.  The strength of my kick is received in full reaction back to my foot, and since I’m making contact on the top of my foot it torques my ankle to extend even further than it already is.  The ankle only goes so far before the ligaments get sprained.  Now, the body has a built in way to reduce this kind of torque on the ankle.  It’s the muscles on the front of the lower leg.  You know, the ones that I extend for the kick, preventing them from flexing?  Yeah…I sort of dug myself into a hole with that one.  The problem is even worse for me because my feet are so big that I provide an even longer effort arm for the torque.  Maybe small footed people don’t have this problem.

Gaining an extra six inches or so on my kick is great and all, but I feel that the negatives outweigh the positives.  Kicks that contact at the top of the foot are at a slight disadvantage because the ankle gives way during impact, increasing the time of impactIt would be better to make contact with the bottom of the tibia.  That part of the bone is HUGE by comparison to the meta-tarsals.  All of that stuff above about bending stress can be used in your favor if you use the right part of your body, and either end of the tibia works fantastically.

Conclusion
Well, that was a lot of text.  Hopefully, the physics, engineering, and anatomy references were enough to convince you to refine your techniques to avoid hurting yourself when you strike.  And if that isn't enough for you, then take my personal history of injuries as anecdotal evidence of how NOT to do things.  

Here’s the TL;DR summary:
  1.  Don’t use your head as an impact weapon
  2. Be nice to the bursa on the tip of your elbow
  3. Don’t punch the head unless you can hit at the nose or below
  4. Don’t use the inside part of your knee to strike
  5. Don’t hit with the wide part of your shin; rotate your support foot for proper form
  6. Don’t smash your feet into hard targets; prefer the bottom of the tibia for kicks

Wednesday, December 17, 2014

Whip It, Whip It Good: The Benefits of Compound Torque

Science Concepts: torque, angular velocity, rotational inertia

In a previous article, I talked about the importance of velocity over mass when dealing damage with strikes.  What I didn't say was how you go about doing that.  So that's what I'm going to cover now, at least for circular/curving strikes.  This could be a hook punch, a round kick, a back fist, a stick swing, or any other kind of strike that involves curving motion.

The Science

In my last article, I covered angular velocity.  Generating a fast, curving strike is done by applying torque to generate circular motion at multiple parts of your body.  In fact, generating power in all sorts of athletic contexts is done this way.  It's the way a quarterback throws a football or the way a baseball player swings a bat.  It's the way a hockey player shoots a puck or the way a gymnast tumbles through the air.  Many small instances of circular motion combined, with the right timing, generate incredible speed and power.

Consider this basic example:


This is essentially what happens when you move one of your joints.  However fast your muscles that cause the movement can go is the limit of the angular and linear velocity.  But what if the center of the circle was also moving?  We could achieve that with a situation like this:


The first part swings the second part, which still has the same angular velocity as before, relative to its own center.  However, the center of the second part now has its own angular and linear velocity, adding to the velocity of the tip.

Also keep in mind that each swinging motion has a beginning, middle, and end at which the speed is increasing, maximum, and decreasing, respectively.


Conceptually, this is enough to apply.  Mathematically, we would find the angular acceleration of each swinging piece and find where it changes from positive to negative to determine the point at which the angular velocity is maximum.  Yay calculus.

Another important concept for curving strikes is rotational inertia.  Rotational inertia is a property of an object to resist a spinning motion.  The exact calculation of this property depends on the density of the object, the shape of the object, and the direction of rotation.  Wikipedia has an excellent entry on it here.  To see how rotational inertia relates to regular inertia (which is just measured by mass), let's look at the formula for kinetic energy.

K = ½ mv2
K = ½ m(rw)2,      this is because v = rw
K = ½(mr2)w2,      this is just distributing the exponent and regrouping to look like the original energy equation.

So, you can see that the third line is structured like the first accept that we have ? (angular velocity) instead of v (linear velocity) and mr(rotational inertia) intsead of m (linear inertia).  Now, this is true for a point mass, but for more complex objects you need to get an average (usually via an integral) but on to the point.

Since the formula above involves the radius of the rotating object and since energy cannot be created or destroyed (one of those physic laws that is never violated, ever), if we change the radius by moving a limb in towards the center or out away from it, the angular velocity must change as well in order to keep the energy the same.  The typical example of this is when a figure skater spins and pulls her limbs in to start spinning faster.  She didn't create energy.  She just shifted the source of the energy from the radius to the angular velocity.  

We can use this idea for curving strikes as well.  This shows up most easily in hook punches, hook kicks, and swinging stick strikes.  If you use your muscles to get your body rotating with the limb out and then pull it in (as in for a tight hook punch) then the velocity will increase (every little bit helps).  Remember: velocity has a bigger impact of the damage you do than the mass behind the strike.

You can also use rotational inertia in the other direction, with some good timing to help get a strike up to speed with less energy than staying at full extension.  By staying tight to your body (think, back spin kick), you can rotate very quickly and easily.  Once your speed is up and you're coming around to your target, extend your limb at the last moment (no pun intended) to get the best (ish) of both worlds.  Because you extend your limb just prior to impact, the extra rotational inertia doesn't have much time to slow down your motion.  So you can the speed from a tight spin with full extension.  Keep in mind that your timing has to be excellent for this to work.  Otherwise, your extension will just cause your strike to slow down and reduce the damaging effects.

The Application

What does this mean for techniques?  It means that getting multiple joints of your body engaged in a motion so that they are all moving in the same direction, for a moment, is the way to maximize your speed (and therefore kinetic energy).  For a round kick your quadriceps swing your shin, your hip flexors swing your upper leg, your torso swings your hips, and your supporting leg pivots your torso.  When all of these motions work together so that the maximum speed of each motion coincides, the result is a very fast and powerful kick.  Combine that with a well timed extension, using rotational inertia, and you're going to be kicking very hard indeed.

Just apply these concepts to any rotating motion to achieve optimal speed at an instant of time.

Conclusion

Curving attacks are just like any other athletic movement.  You have to get your whole body working together with the right timing.  That's what coaches all over the world will tell you.  Scientifically, they're saying that you need the angular velocity of each joint in your body to coincide in time to match up at their highest points to achieve that ultimate result of a speedy...whatever it is you're doing.  By using the concept of rotational inertia, you can provide a mechanical advantage to achieve even higher speeds.  Think through your techniques and really analyze the motion of each joint of your body as you go through those techniques.  When you get the timing right, the end result can be quite impressive.

Wednesday, December 10, 2014

The Inner Circle: Make Defense Less Difficult

Science concepts: angular velocity, linear velocity

In the classes I teach, I almost always have the students do knife sparring as part of the warm up.  I make it into a bit of a game where getting cut in various target zones requires you to do certain exercises (to de-incentivize bad habits).  It's easy to tell who has been with us for a while and who is new by watching who is doing the most exercises.

One of the pit falls that untrained people seem to get into is watching the knife too closely.  Now, I'm not advocating that you don't keep track of the knife.  In a real situation, that's the thing that'll kill you.  So, you should definitely track it, but I recommend that people watch the elbow (and the forearm to an extent) rather than the knife.  Invariably, when I tell people to do this, they see immediate improvement.  Why?  Because of the difference between angular velocity and linear velocity.

Definitions

Linear velocity is the easy one.  That's simply how much distance is covered per unit of time.  I covered this way back in the physics primer.  Angular velocity is a bit different.  It's all about circles.  It is the portion of a circle swept out per unit of time.  This is often depicted uses a unit of radians per second.  Radians are a bit weird.  They're a unit...but not.  There are 2π radians in a circle (just like 360 degrees covers a circle).  So, 180 degrees is equivalent to 1π.  If a wheel rotates all the way around two times per second, then the angular velocity would be 4π rad/s.

To find the linear equivalent of an angular velocity you need to know the radius of the circle being swept out.  Once you know that the conversion is easy.  Just take the angular velocity, ω (angular velocity...and acceleration...and angles are often depicted using Greek letters, this isn't a 'w' it's a lower-case omega) and multiply it by the radius r to get the linear velocity, v.

 v = rω

Simple enough.

The Science

Like I've said before, joints allow for circular motion.  In the case of a slashing knife or a hooking punch, the shoulder is effectively the center of the circle.  The elbow is about halfway out and the hand is on the outer edge of the circle.  Let's look at a generic example:


The picture could represent a swinging stick.  Though I'm just using it to illustrate the basics here.  Since the stick is rotating about one end, each part of the stick has the exact same angular velocity, ω.  The same number of radians are being swept out per second.  However, the linear velocity of each point is different based on how far from the center of rotation it is.  Here, the end point has a velocity of rω, but the midpoint has a velocity of (r/2)ω.  That's half the velocity.

When trying to track motion with your eyes, slower is easier.  The less degrees of freedom the thing your eyes are tracking has, the easier it'll be to keep up.  This is why watching the elbow is easier than watching the hand.  The nice thing about watching the elbow is that it'll reveal the direction from which the hand will strike you.  So, you don't lose any information and it's easier to obtain.  Win-win.

Applications

The applications of this principle are many and varied.  At my dojo, we teach watching the elbow as part of our essential knife defense for beginners.  When dealing with punches, we watch the elbows to increase effectiveness in capturing the extended arm.  When stick fighting, watching the forearm and hand is way easier than trying to track the tip of the stick, which can move at ridiculous speeds (scientifically, "ridiculous" speeds are somewhere near "plaid").  As a former Taekwondo guy, I can say that watching the knee is easier than watching the foot and provides just as much information about where the attack is coming from.  One time I landed a kick on a guy's nose using some TKD trickery.  My success was only there because he watched my foot rather than my knee (probably...given that he was better than me).  The list goes on.

Conclusion

Angular velocity is a relatively simple and low-level principle, which is why is applies to so many areas of fighting.  Understanding angular velocity and how it is different from linear velocity will help you to understand why many techniques are taught they way they are.  Also, getting a firm grasp on angular velocity (and angular movement) will be required for understanding slightly more complicated things like rotational inertia and how it relates to energy...but that's for another time!

Wednesday, December 3, 2014

Sweep The Leg!

Science concepts: friction, force diagrams

A big part of fighting successfully is unbalancing your opponent, in any way possible.  Sometimes the unbalancing is purely mental.  Usually, it's structural.  Foot sweeps are one of the ways to structurally unbalance an opponent while in "striking mode."  Different martial arts do sweeps differently, but what is the science behind each of the techniques?  My position is that, once you understand this scientific concept, you'll be able to ad lib your own foot sweeps into a fight without having to drill the particular technique dozens of times first.  In my opinion, there are only three different situations with which to be concerned.

Definition

First, let me define what I mean by a sweep.  For this article, I'm only talking about stand-up fighting.  So, no ground stuff.  A foot/leg sweep for my purposes here is any technique that directly attacks a leg for the purpose of unbalancing or taking down an opponent.  The technique could be subtle or overt, beautiful or ugly.  As long as it attacks the leg for unbalancing and it works, then it's a sweep.

Three Situations

I see three different situations regarding leg sweeps.  Some martial arts address all of them, some do not.  The situations all have to deal with the percentage of weight being supported by the leg to be attacked.  Without getting into specific numbers, we can effectively break it down into "high", "medium", and "low" weight distribution to the leg.

Sweeps that require a high percentage of the opponent's weight to be on a leg don't work nearly as well, if at all, when a low percentage of weight is on the leg.  The reverse is true as well.  If a technique requires either high or low weight and the person is more in the middle, then maybe you can force the technique, but it's going to be ugly and probably require some adaptation half-way through.  But if the technique you're using calls for medium weight distribution, then you're good to go.

The Representative Techniques

For the sake of illustration, I've chosen a technique for each of the situations described above.  For the high percentage of weight on the leg a major outer reaping throw (known to some as "osoto gari") is a good technique.  By "good" I mean that it not only applies to the situation but is also relatively easy to execute and is likely to succeed once you're in position.

(I was supposed to get pictures/video of myself doing the techniques, but it slipped my mind the last time I was at the dojo.  Youtube videos will have to suffice for now.)


For the medium percentage of weight I could have chosen the basic Karate leg sweep, but I don't want Japan to get all the credit.  So, I'm going to look at the sapu from Silat.


For the low percentage of weight there are lot's of martial arts that do this technique.  Judo has it.  Wrestling has it.  Silat and BJJ have it.  For the sake of making things easy to understand, let's just call it a modified sapu with a leg grab.

(I couldn't find a video of this technique.  Imagine a sapu that lifts the leg into your hand for grabbing.)

The Science

The big factor that we're concerned with in all of these different weight distribution situations is friction.  Friction is the force that resists sliding motion between two surfaces.  In general, the friction force, f, is defined this way:

 µN

where N is the "normal" force (the reaction force from the surface or ground that stops the object from accelerating towards the center of the planet), and
where µ is the Greek letter "mu" and denotes the coefficient of friction between two surfaces (it's the "grippy-ness" between the surfaces)

For examples of different µ values, concrete and rubber have a µ of 1.0 while brass and steel have a µ of 0.51 (much more slippery).

This equation tells us that the friction force is directly proportional to the normal force.  The normal force is equal (but opposite) of the force pushing directly into the ground.
Classic "wedge" force diagram :-)


The orange forces are reaction forces from the components of the applied weight on the ramp.  I used a ramp here for illustrative purposes, but I could have used a flat surface with the support leg pushing into the ground at an angle (as is the case with a wide stance).  The principles at work are the same in either case.

So, the normal force is equal to the component of the weight that is perpendicular to the surface.  The friction force is equal to the component of the weight that is parallel to the surface.  This is why I separated foot sweeps into three categories.  If a lot of weight is put on one foot, then the maximum friction applied by the ground is high, which makes a foot sweep like the sapu very difficult but the outer reaping throw ideal.  In any case, the amount of force, parallel to the ground, that you need to apply to your opponent's foot to affect a sweep is dependent on how much weight they are putting on that foot and what the surfaces involved are.

The Application

Like I said before, the technique for a good foot sweep varies with the amount of weight the person puts on the leg to be swept.  With a lot of weight on the foot, you'd better apply a lot of force to get it to move.  That's why the major outer reaping throw works well here.  You can keep their balance on the foot that you strongly sweep away.  If you sweep out their main support leg, they fall down.  Mission accomplished.

Getting the sapu to work requires a bit more finesse.  If they have too much weight on the leg when you attempt the sapu, virtually nothing happens to them.  If they have too little weight, then they will simply lift their leg (because they can balance on their other leg) away from your sweep.  Luckily, in that case, you can modify your sweep to scoop the leg up into your arms, which puts 100% of their weight on their other foot, allowing you to sweep that one with a big reap.

Each of these sweeps require extra force to be applied if the surface has good traction.  However, you can alter the amount of force required by pushing or pulling your opponent, shifting their weight.  In practice, I wouldn't expect anybody to memorize tables of friction coefficients to figure out how much strength to apply a sweep is necessary.  You just have to train on a variety of surfaces with a variety of different sized people to start getting a feel for it.

Conclusion

The three techniques I listed here are just scratching the surface of leg/foot sweeps, but hopefully you now have the necessary scientific background to understand why most sweeps work.  As with all of my articles, my goal is to provide the necessary knowledge for you to create your own techniques on the fly.  This is because in the chaos of a real fight, you'd be lucky to start a technique without having to modify half-way through, let alone planning for a technique and actually have it work in reality the same way that it worked in your head.  When you can adapt to the situation using scientifically sound principles, then you will be more likely to do the right thing at the right time.